The Complete NeoVim Configuration Guide for Developers - Part 1
Neovim (nvim) is essentially Vim, but improved, rewritten, and has attracted the majority of the original editor's community. This project has significantly surpassed the original Vim in GitHub statistics (34k vs 75k stars as of 2024). So, if you decide to start programming in the console in 2024, Neovim is your choice.
Why is this even necessary when convenient IDEs and modern editors like Visual Studio Code exist? Usually, two arguments are made:
- Speed. In any Vim-like editor, the main feature is the use of key combinations. With enough practice, you can navigate and edit code much faster than if you had to reach for the mouse every few seconds.
- Lightweight. Nvim is a utility that runs in the console and consumes very few resources. IDEs, on the other hand, are large and heavy programs that, on a 2022 Mac, struggle to allow the opening of 3-4 projects simultaneously.
I partially agree with the first argument: we read code and think about what to write more than we type it on the keyboard. Therefore, if you think that mastering Nvim will give you an edge over a colleague with a mouse – no, it won't. However, where you will indeed outperform your colleague with a mouse is in convenience. Once you get used to Vim key combinations, you won't be able to type like you used to – it will feel very inconvenient.
I completely agree with the second argument – Nvim is lightweight and fast, and the ability to run my familiar editor in any console, on any modern or not-so-modern operating system, and on any device – from an old laptop to a phone – personally appeals to me.
This article is not meant to sell you this editor – it is definitely not for everyone. First, you need to learn how to work with it, and then it takes time to configure it. If this idea doesn't appeal to you, it's probably easier to buy a JetBrains subscription or download Visual Studio Code, open it, and everything will work right away. However, if you like Linux, enjoy configuring the tools you work with, and like the idea of open source, then there's a good chance you'll like Nvim too.
In this article, I won't explain how to work within Vim – there are many tutorials and materials that describe this. Instead, I will explain how to configure Nvim from scratch to get an editor that looks and functions very much like an IDE.
All the configuration was done on a MacBook running macOS 14, using WezTerm as the terminal. WezTerm has its own peculiarities when working with hotkeys, which I will mention below, but the same configuration can be easily run on any Unix-like system, which might even be a bit simpler. I will set everything up from scratch on a clean system to address all potential questions.
First, let's download and install WezTerm – in my opinion, the best terminal, which can also be customized: WezTerm Installation. Download and install the package for your OS.
Out of the box, it doesn’t exactly impress:
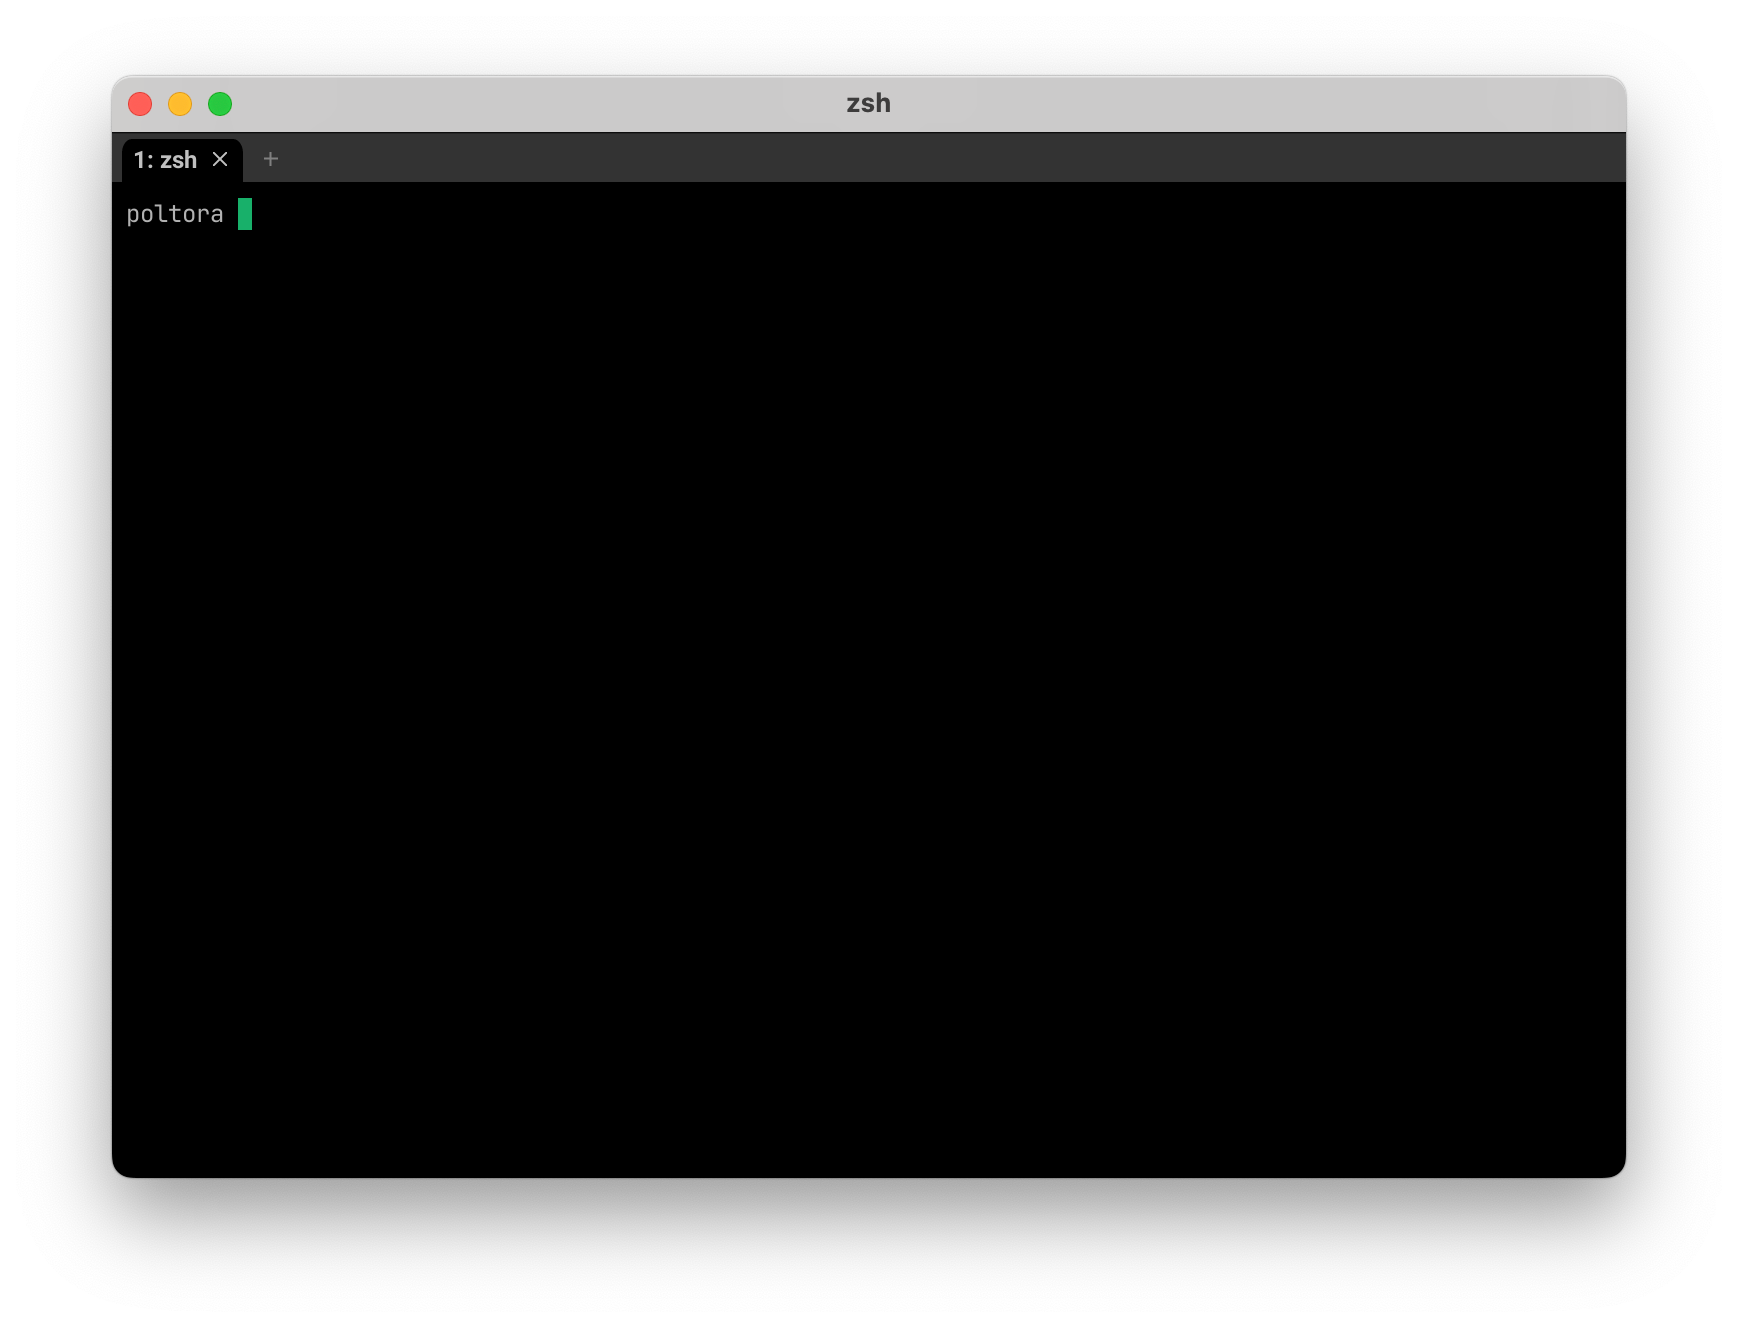
Let's fix this. Create a configuration file:
poltora ~: mkdir -p ~/.config/wezterm/
poltora ~: touch ~/.config/wezterm/wezterm.lua
poltora ~: vim ~/.config/wezterm/wezterm.lua
Open Vim, where we insert the following settings:
local wezterm = require 'wezterm'

local config = {}

if wezterm.config_builder then
  config = wezterm.config_builder()
end

config.color_scheme = 'Atelierdune (light) (terminal.sexy)'
config.font = wezterm.font('JetBrains Mono', { weight = 'Medium' })
config.font_size = 16
config.hide_tab_bar_if_only_one_tab = true
config.window_background_opacity = 0.95
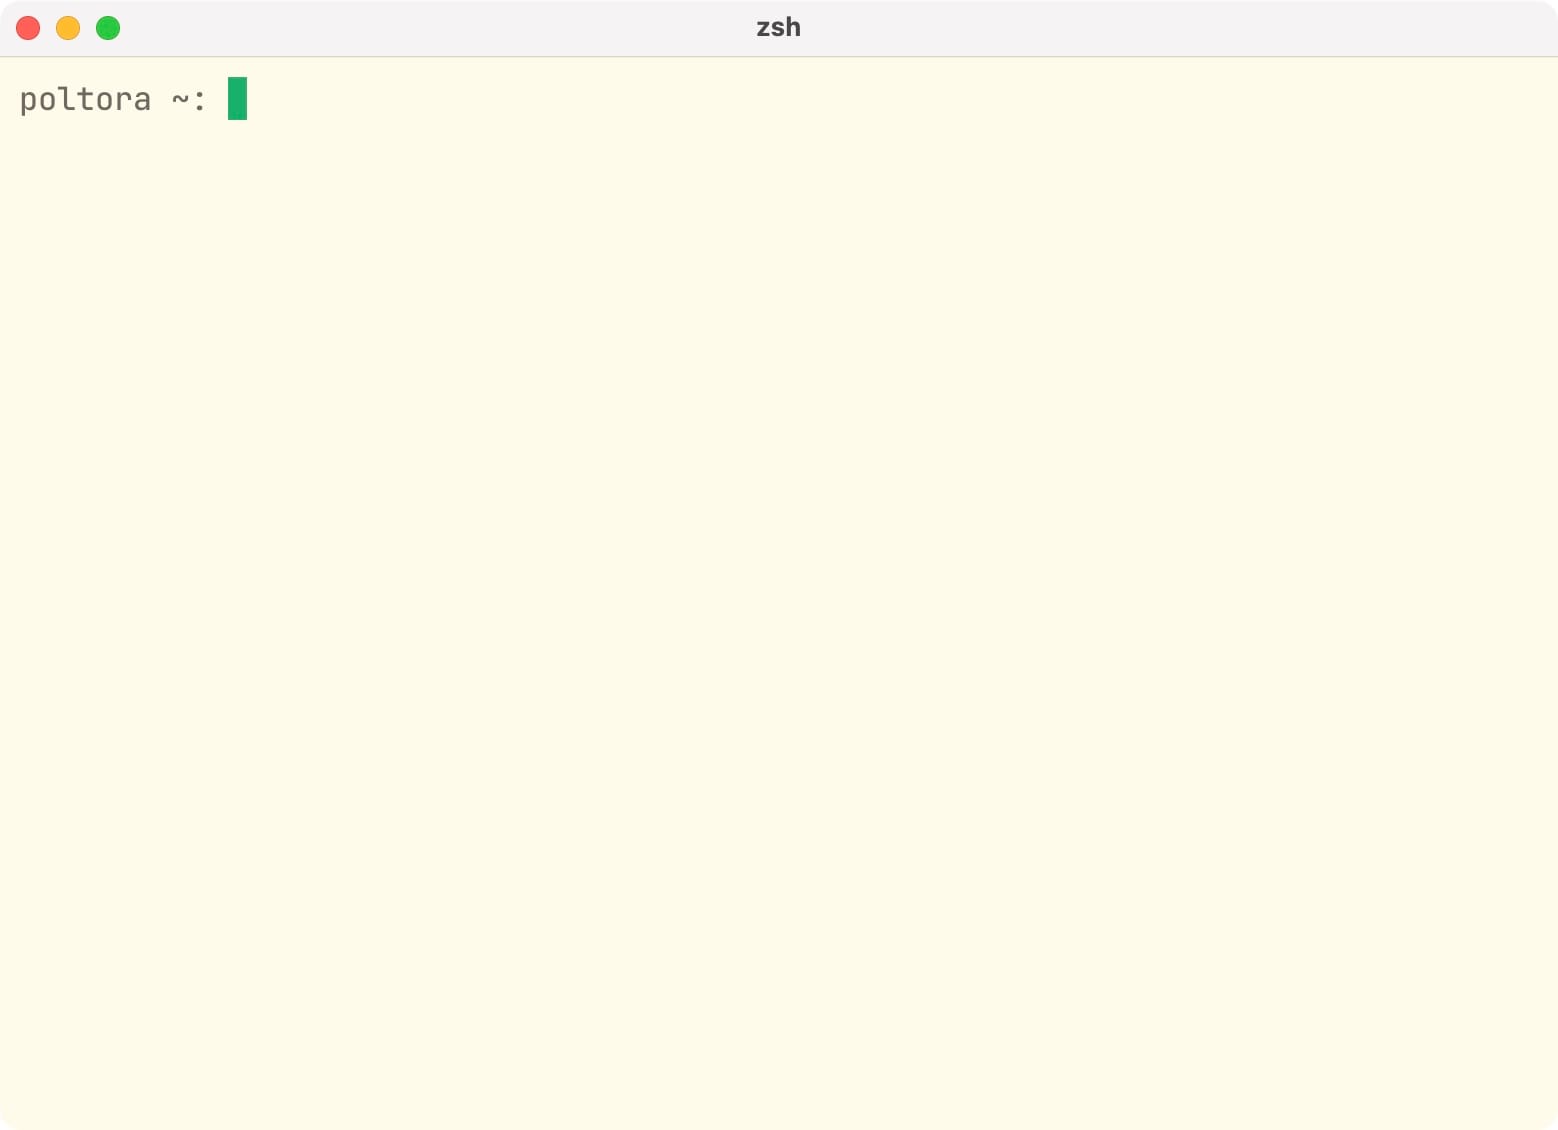
return configPress :wqa, restart the terminal, and here’s the result:
Now let's install Neovim. There are many installation methods depending on your system and environment; you can read about each in detail in the official manual - Neovim Installation Guide.
The simplest way for macOS is to install it as a package:
poltora ~: brew install neovimAfter installation, launch Neovim:
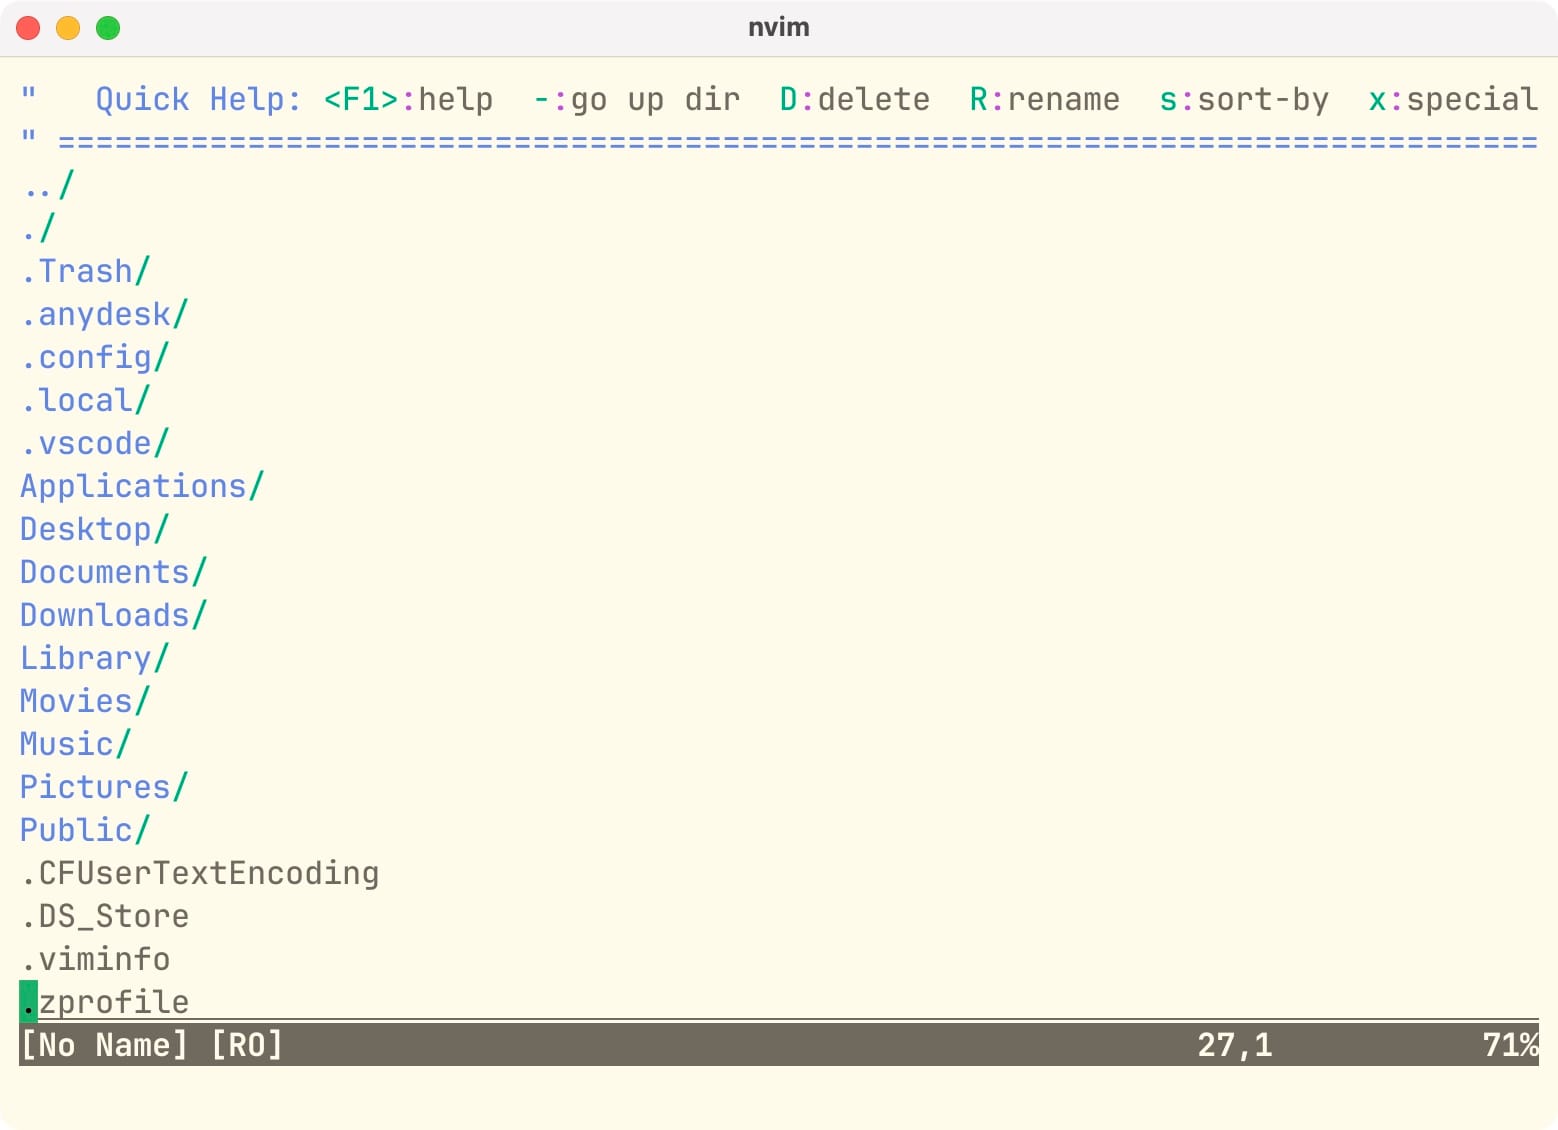
poltora ~: nvim .The default editor opens, which, to put it mildly, doesn't resemble an IDE much:
Close it with the :q command and start configuring. First, create the root configuration file:
mkdir ~/.config/nvim
touch ~/.config/nvim/init.lua
nvim ~/.config/nvim/init.lua
The configuration will mainly consist of settings for various plugins. To install plugins, we need a plugin manager, which I now suggest adding.
Plugin Manager
There are many plugin managers, but I use one of the most popular - VimPlug. Install it with the command:
sh -c 'curl -fLo "${XDG_DATA_HOME:-$HOME/.local/share}"/nvim/site/autoload/plug.vim --create-dirs \
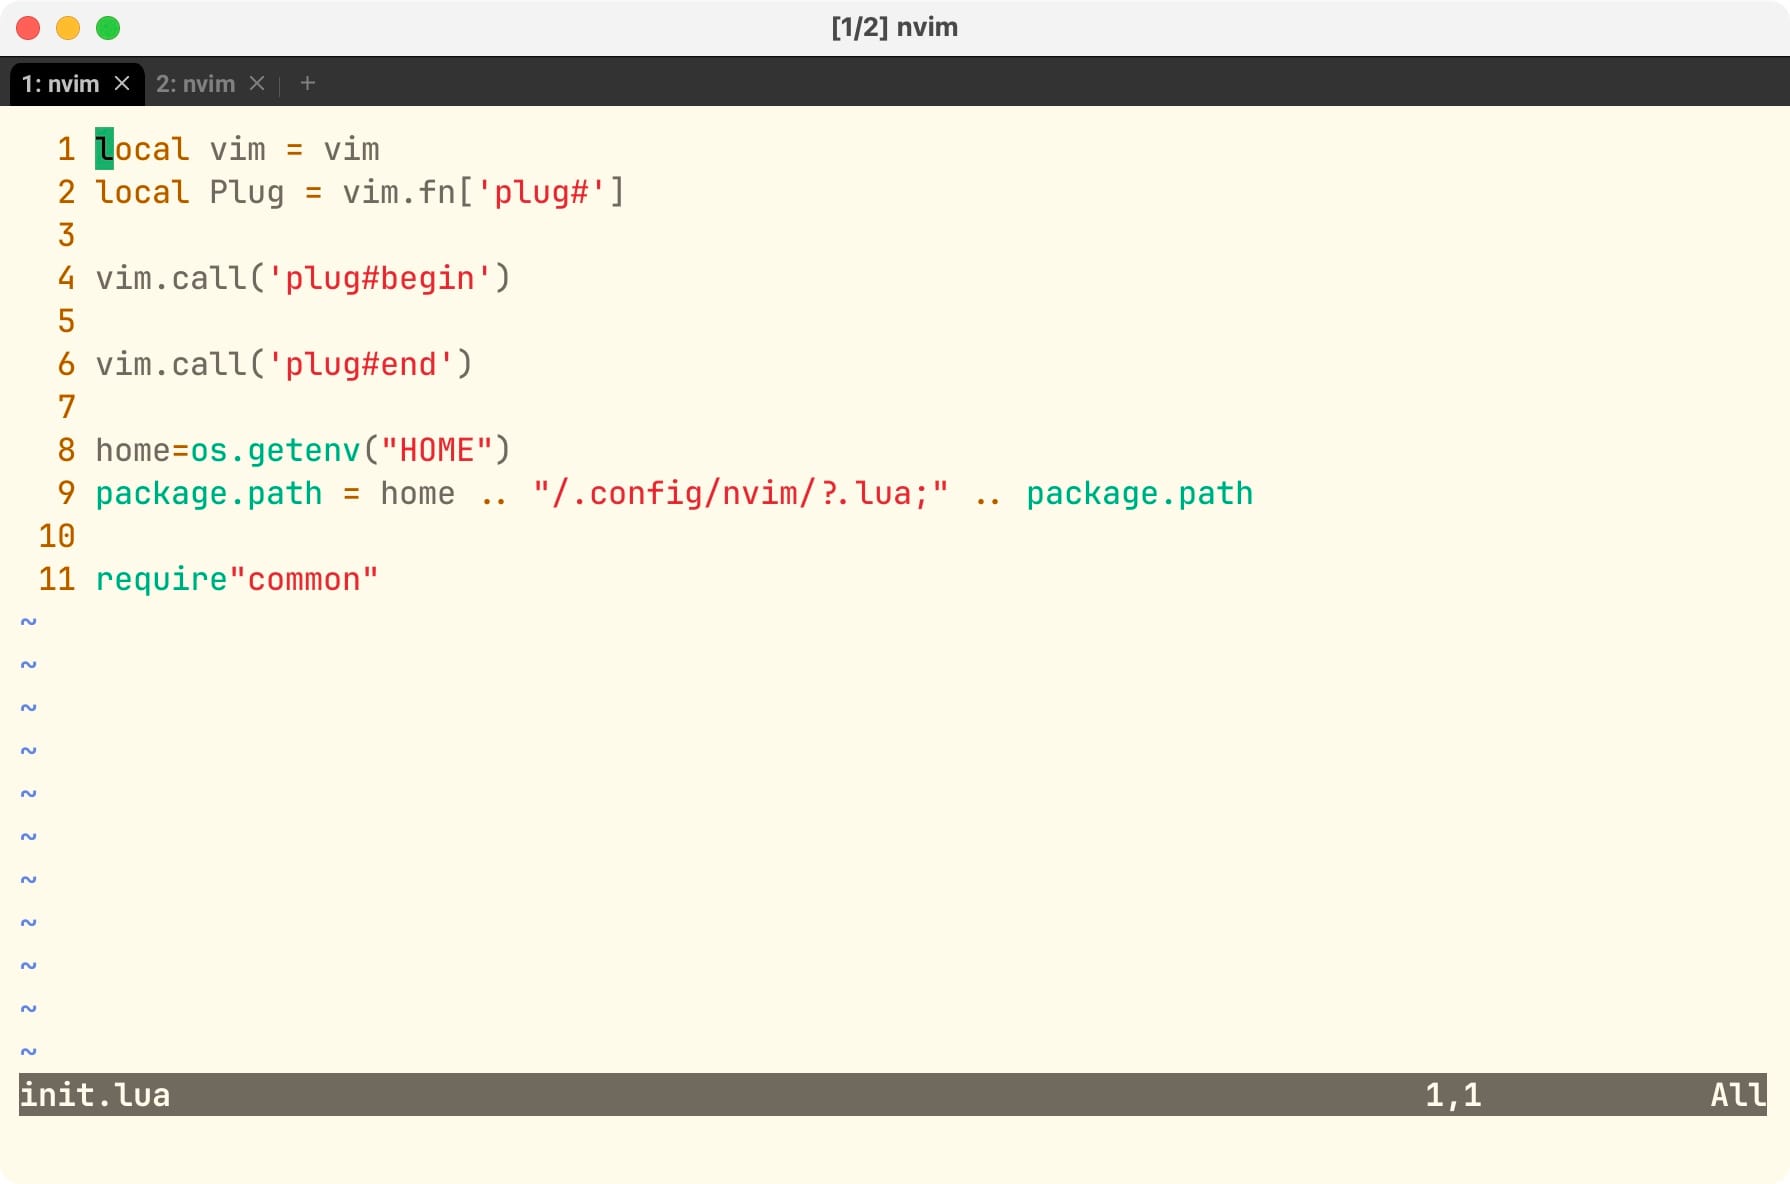
https://raw.githubusercontent.com/junegunn/vim-plug/master/plug.vim'Now open the configuration file ~/.config/nvim/init.lua created earlier and add the following structure:
local vim = vim
local Plug = vim.fn['plug#']

vim.call('plug#begin')

vim.call('plug#end')
In the future, all plugins will be added between the vim.call('plug#begin') and vim.call('plug#end') tags. Save, restart, and if there are no errors in the console, the manager is successfully installed.
To keep our configurations organized, I will add all settings and configurations for each plugin in a separate Lua file, which will be placed alongside init.lua. Let's create a common.lua file and write some basic settings into it.
common.lua:
-- отобразить номера строк
vim.wo.number = true
-- включить управление мышью
vim.g.mouse = 'a'
vim.opt.encoding="utf-8"
-- выключаем своп файла
vim.opt.swapfile = false

-- устанавливаем настройки табуляции и отступов
vim.opt.scrolloff = 7
vim.opt.tabstop = 4
vim.opt.softtabstop = 4
vim.opt.shiftwidth = 4
vim.opt.autoindent = true

vim.opt.fileformat = "unix"
Now, go back to init.lua and include this file:
local vim = vim
local Plug = vim.fn['plug#']

vim.call('plug#begin')

vim.call('plug#end')

home=os.getenv("HOME")
package.path = home .. "/.config/nvim/?.lua;" .. package.path

require"common"
Reload Neovim, and if you see line numbers, everything is working:
Themes
First, let's make Neovim visually resemble an IDE. There is a great website with a catalog of community themes - Vim Color Schemes, where you can choose a theme to your liking. I am used to working with light themes, and through trial and error, I found the best one for me - Kanagawa, which I suggest we install. Create a new file theme.lua and add:
vim.cmd.colorscheme("kanagawa")In init.lua, add the new plugin and include theme.lua:
local vim = vim
local Plug = vim.fn['plug#']

vim.call('plug#begin')

Plug('rebelot/kanagawa.nvim')

vim.call('plug#end')

home = os.getenv("HOME")
package.path = home .. "/.config/nvim/?.lua;" .. package.path

require "common"
dofile("theme.lua")
Reload Neovim, execute :PlugInstall, reload again, and you will see that the theme has been applied.

Now, let's make the file tree display just like we are used to in an IDE.
Nvim-Tree - File Tree
To display the file tree, we will use the nvim-tree plugin. Create a file vimtree.lua and add the following settings:
-- disable netrw at the very start of your init.lua
vim.g.loaded_netrw = 1
vim.g.loaded_netrwPlugin = 1
-- optionally enable 24-bit colour
vim.opt.termguicolors = true
-- empty setup using defaults
require("nvim-tree").setup()
-- OR setup with some options
require("nvim-tree").setup({
sort = {
sorter = "case_sensitive",
},
view = {
width = 30,
},
renderer = {
group_empty = true,
},
filters = {
dotfiles = true,
},
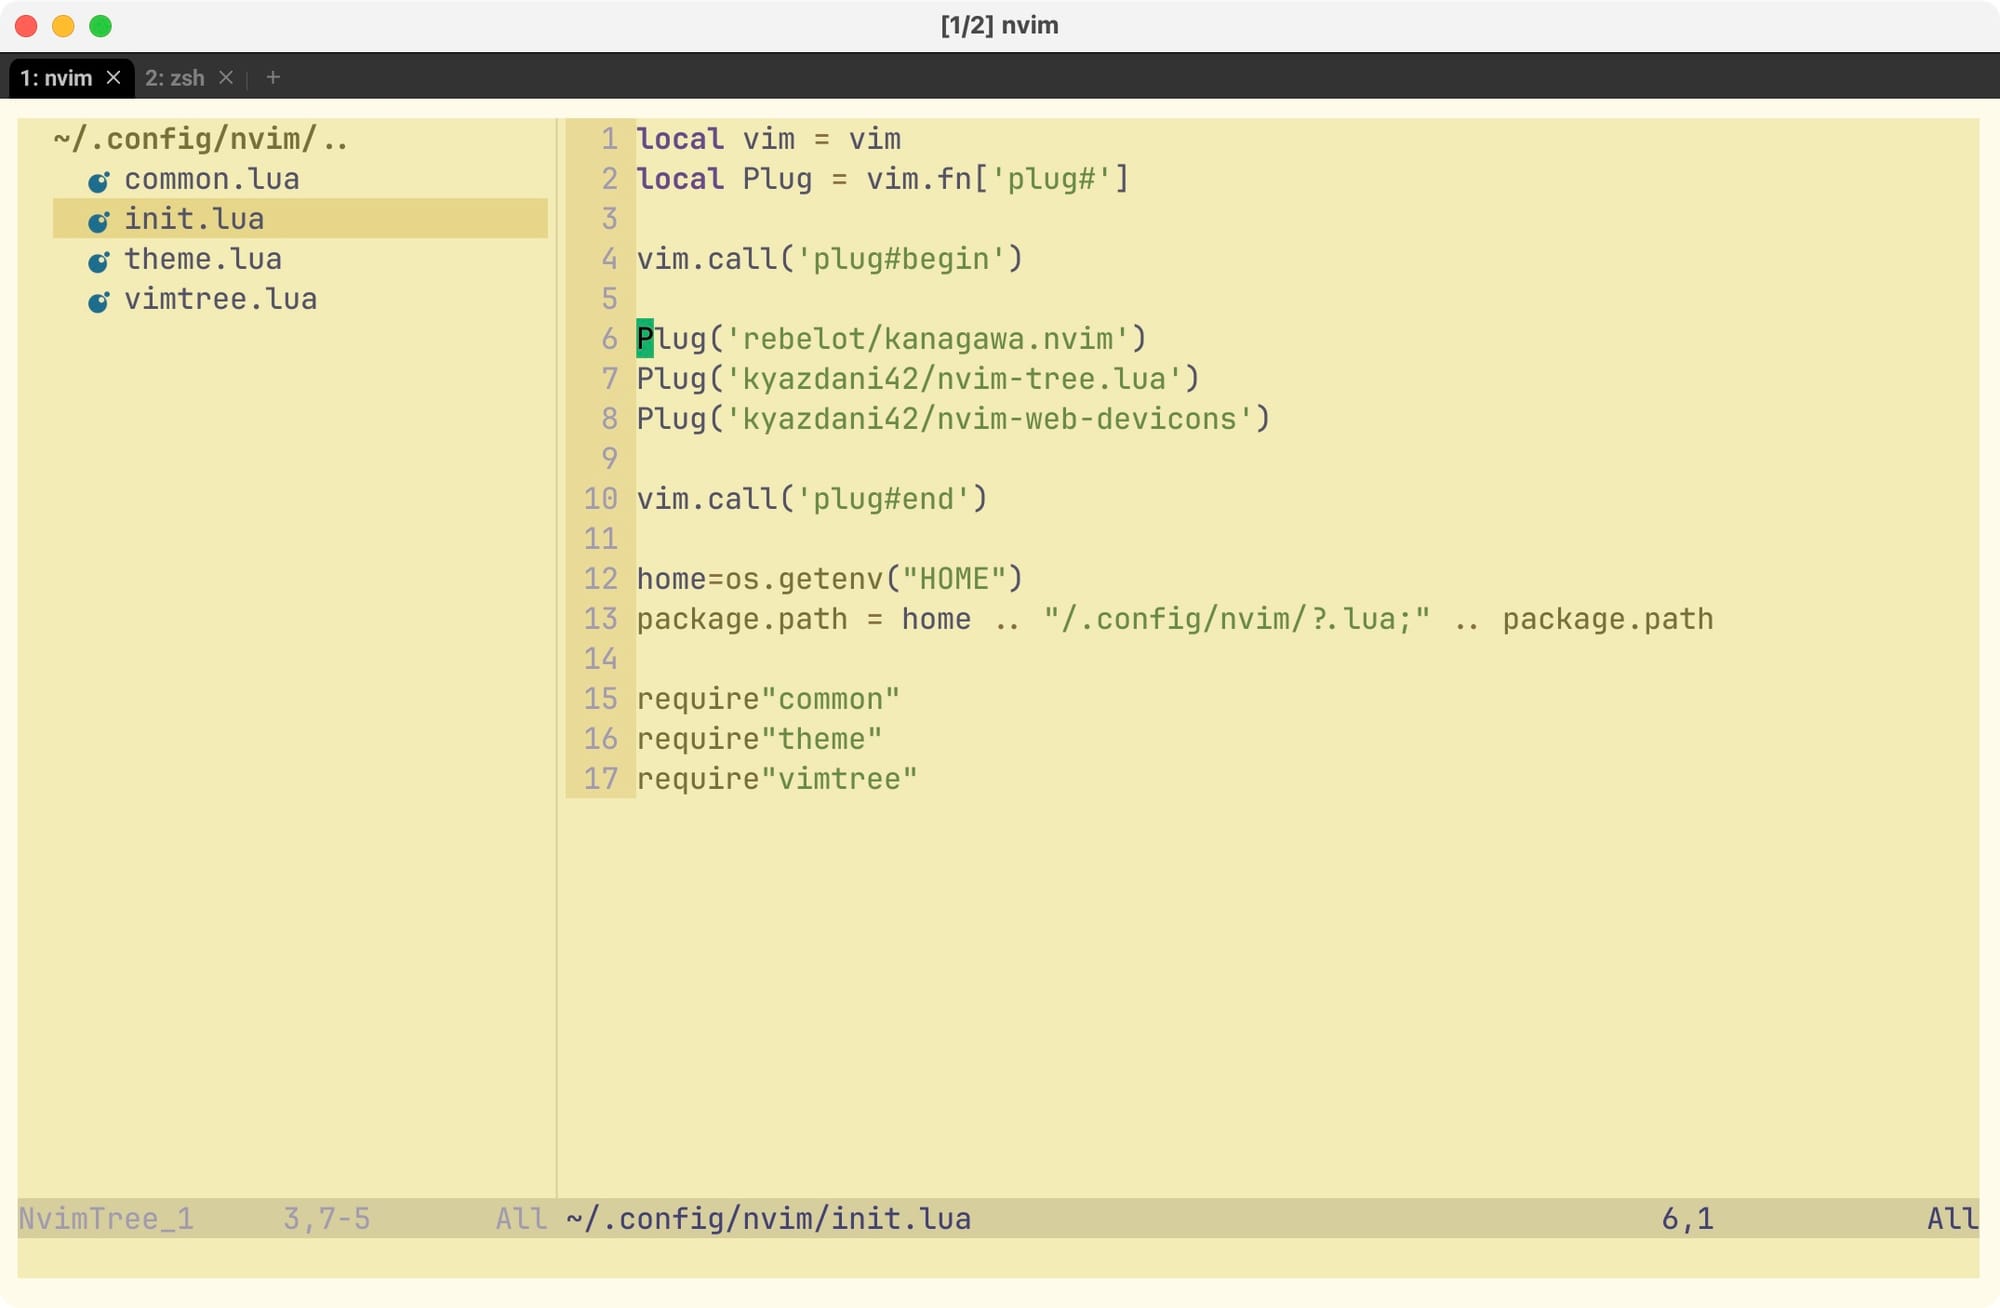
})Now, add the nvim-tree plugin and a plugin for file icon support, and activate the file with the nvim-tree settings in init.lua:
local vim = vim
local Plug = vim.fn['plug#']

vim.call('plug#begin')

Plug('rebelot/kanagawa.nvim')
Plug('kyazdani42/nvim-tree.lua')
Plug('kyazdani42/nvim-web-devicons')

vim.call('plug#end')

home = os.getenv("HOME")
package.path = home .. "/.config/nvim/?.lua;" .. package.path

require "common"
dofile("theme.lua")
require "vimtree"
Reload Neovim, install the plugins with the command :PlugInstall, reload again, and you will have a file tree that looks similar to what you're used to in an IDE.
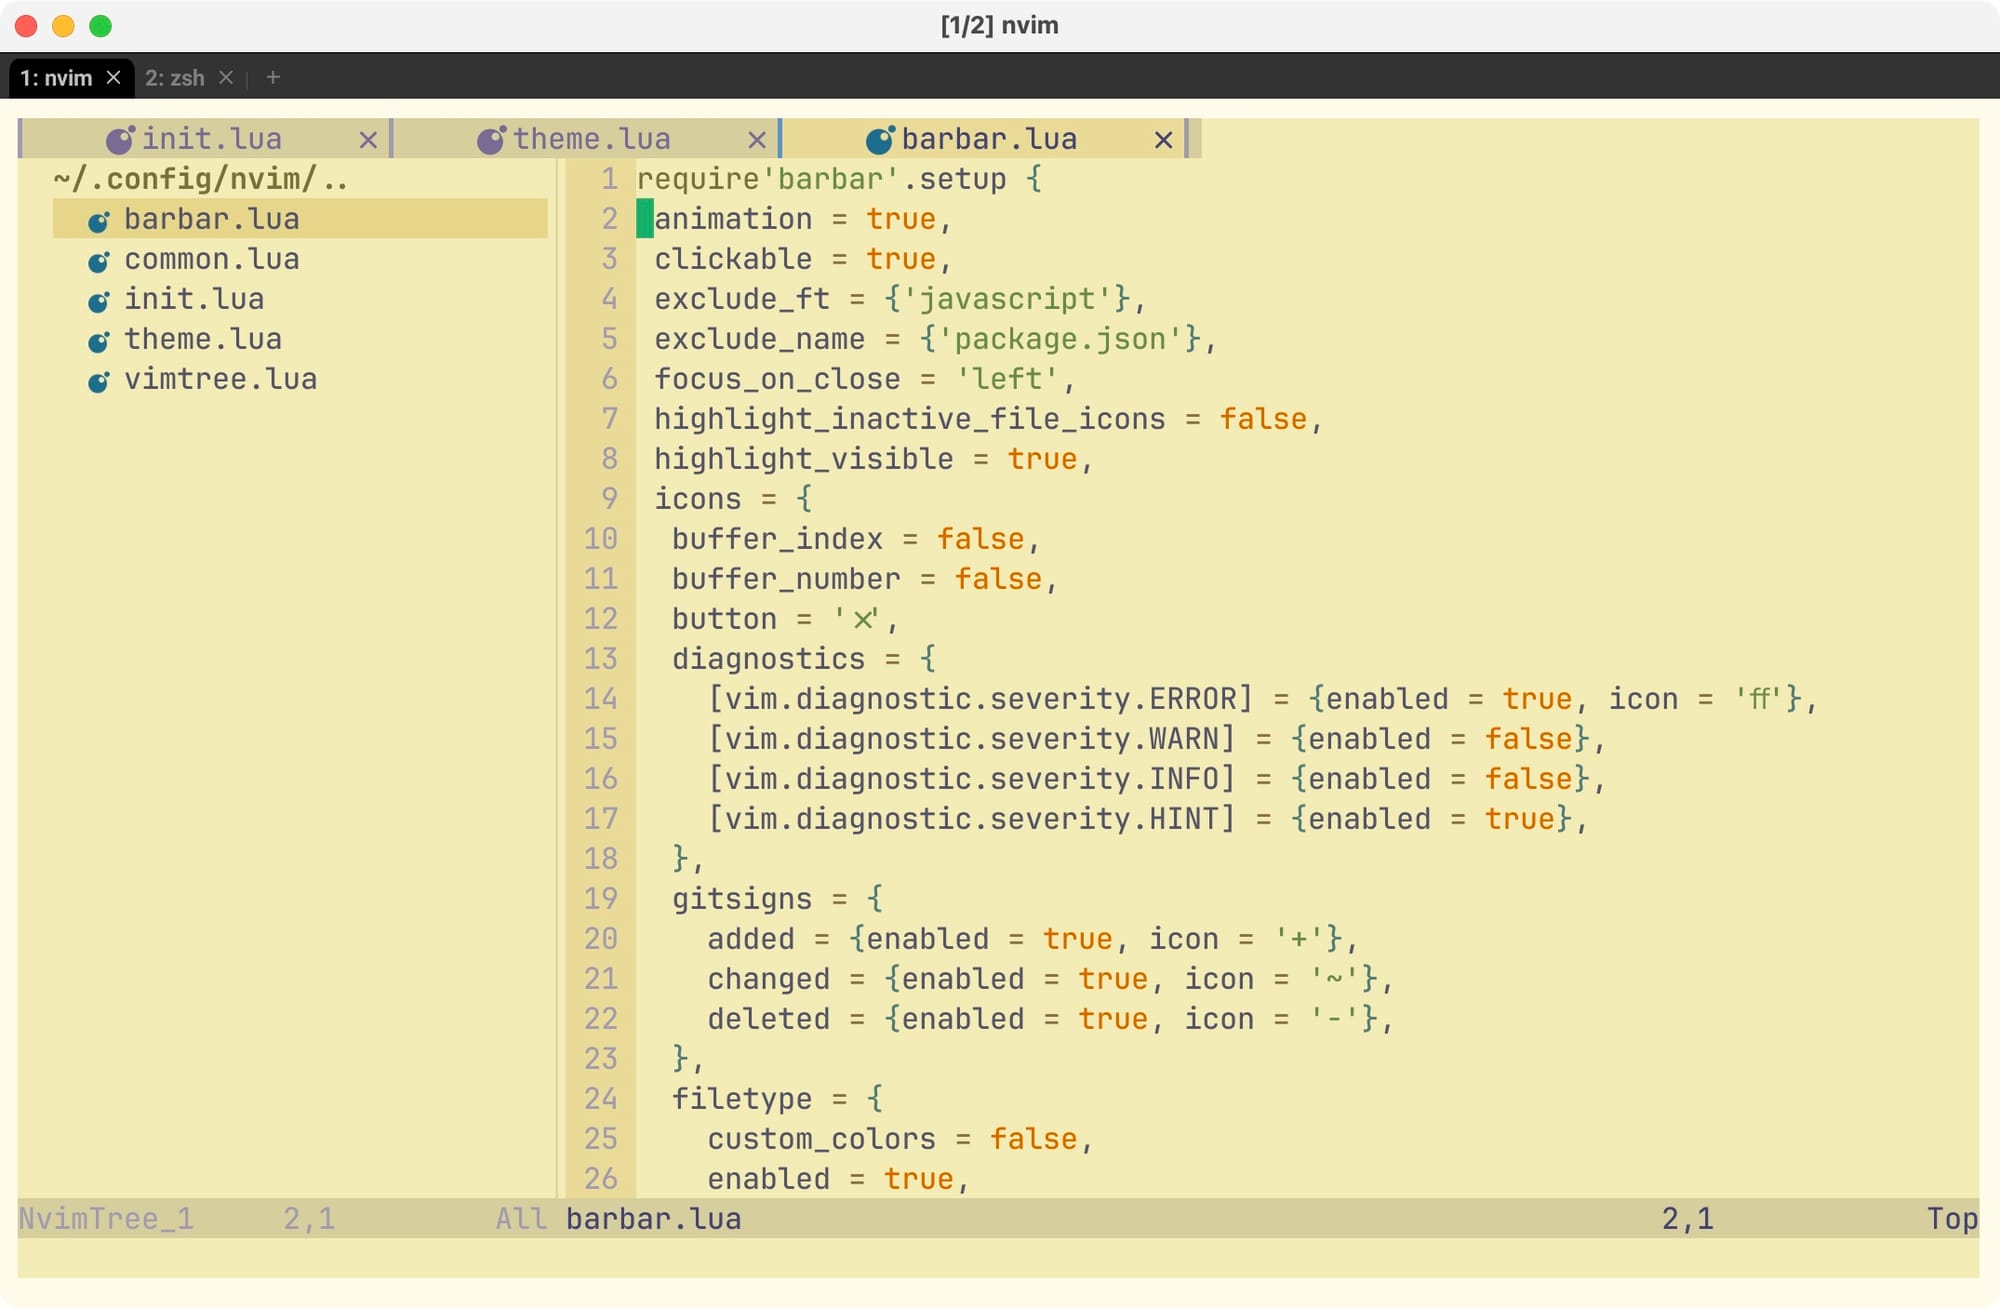
BarBar - File Tabs
Now let's add familiar file tabs to the editor. For this, I will use the barbar plugin. Create a file barbar.lua and add the following settings:
require'barbar'.setup {
animation = true,
clickable = true,
exclude_ft = {'javascript'},
exclude_name = {'package.json'},
focus_on_close = 'left',
highlight_inactive_file_icons = false,
highlight_visible = true,
icons = {
buffer_index = false,
buffer_number = false,
button = '',
diagnostics = {
[vim.diagnostic.severity.ERROR] = {enabled = true, icon = 'ff'},
[vim.diagnostic.severity.WARN] = {enabled = false},
[vim.diagnostic.severity.INFO] = {enabled = false},
[vim.diagnostic.severity.HINT] = {enabled = true},
},
gitsigns = {
added = {enabled = true, icon = '+'},
changed = {enabled = true, icon = '~'},
deleted = {enabled = true, icon = '-'},
},
filetype = {
custom_colors = false,
enabled = true,
},
separator = {left = '▎', right = ''},
separator_at_end = true,
modified = {button = '●'},
pinned = {button = '', filename = true},
preset = 'default',
alternate = {filetype = {enabled = false}},
current = {buffer_index = true},
inactive = {button = '×'},
visible = {modified = {buffer_number = false}},
},
insert_at_end = true,
maximum_padding = 1,
minimum_padding = 1,
maximum_length = 30,
minimum_length = 0,
semantic_letters = true,
sidebar_filetypes = {
NvimTree = true,
undotree = {text = 'undotree'},
['neo-tree'] = {event = 'BufWipeout'},
Outline = {event = 'BufWinLeave', text = 'symbols-outline'},
},
letters = 'asdfjkl;ghnmxcvbziowerutyqpASDFJKLGHNMXCVBZIOWERUTYQP',
no_name_title = nil,
}Now, in init.lua, add the plugin and activate the settings file:
...
Plug('romgrk/barbar.nvim')

vim.call('plug#end')

...
require"barbar"
After reloading Neovim, run :PlugInstall, reload once more, and you will see that the tabs have been successfully added.
Lualine - Status Line
Next, let's add a status line at the bottom using the lualine plugin, which will display the Vim mode, current file, and programming language. Create a file lua_line.lua (it's important to use an underscore to avoid naming conflicts in Neovim) and add the following settings:
require('lualine').setup ({
options = {
icons_enabled = true,
theme = 'auto',
component_separators = { left = '', right = ''},
section_separators = { left = '', right = ''},
disabled_filetypes = {
statusline = {},
winbar = {},
},
ignore_focus = {},
always_divide_middle = true,
globalstatus = false,
refresh = {
statusline = 1000,
tabline = 1000,
winbar = 1000,
}
},
sections = {
lualine_a = {'mode'},
lualine_b = {'branch', 'diff', 'diagnostics'},
lualine_c = {'filename'},
lualine_x = {'encoding', 'fileformat', 'filetype'},
lualine_y = {'progress'},
lualine_z = {'location'}
},
inactive_sections = {
lualine_a = {},
lualine_b = {},
lualine_c = {'filename'},
lualine_x = {'location'},
lualine_y = {},
lualine_z = {}
},
tabline = {},
winbar = {},
inactive_winbar = {},
extensions = {}
})init.lua:
...
Plug('nvim-lualine/lualine.nvim')
...
vim.call('plug#end')
...
require"lua_line"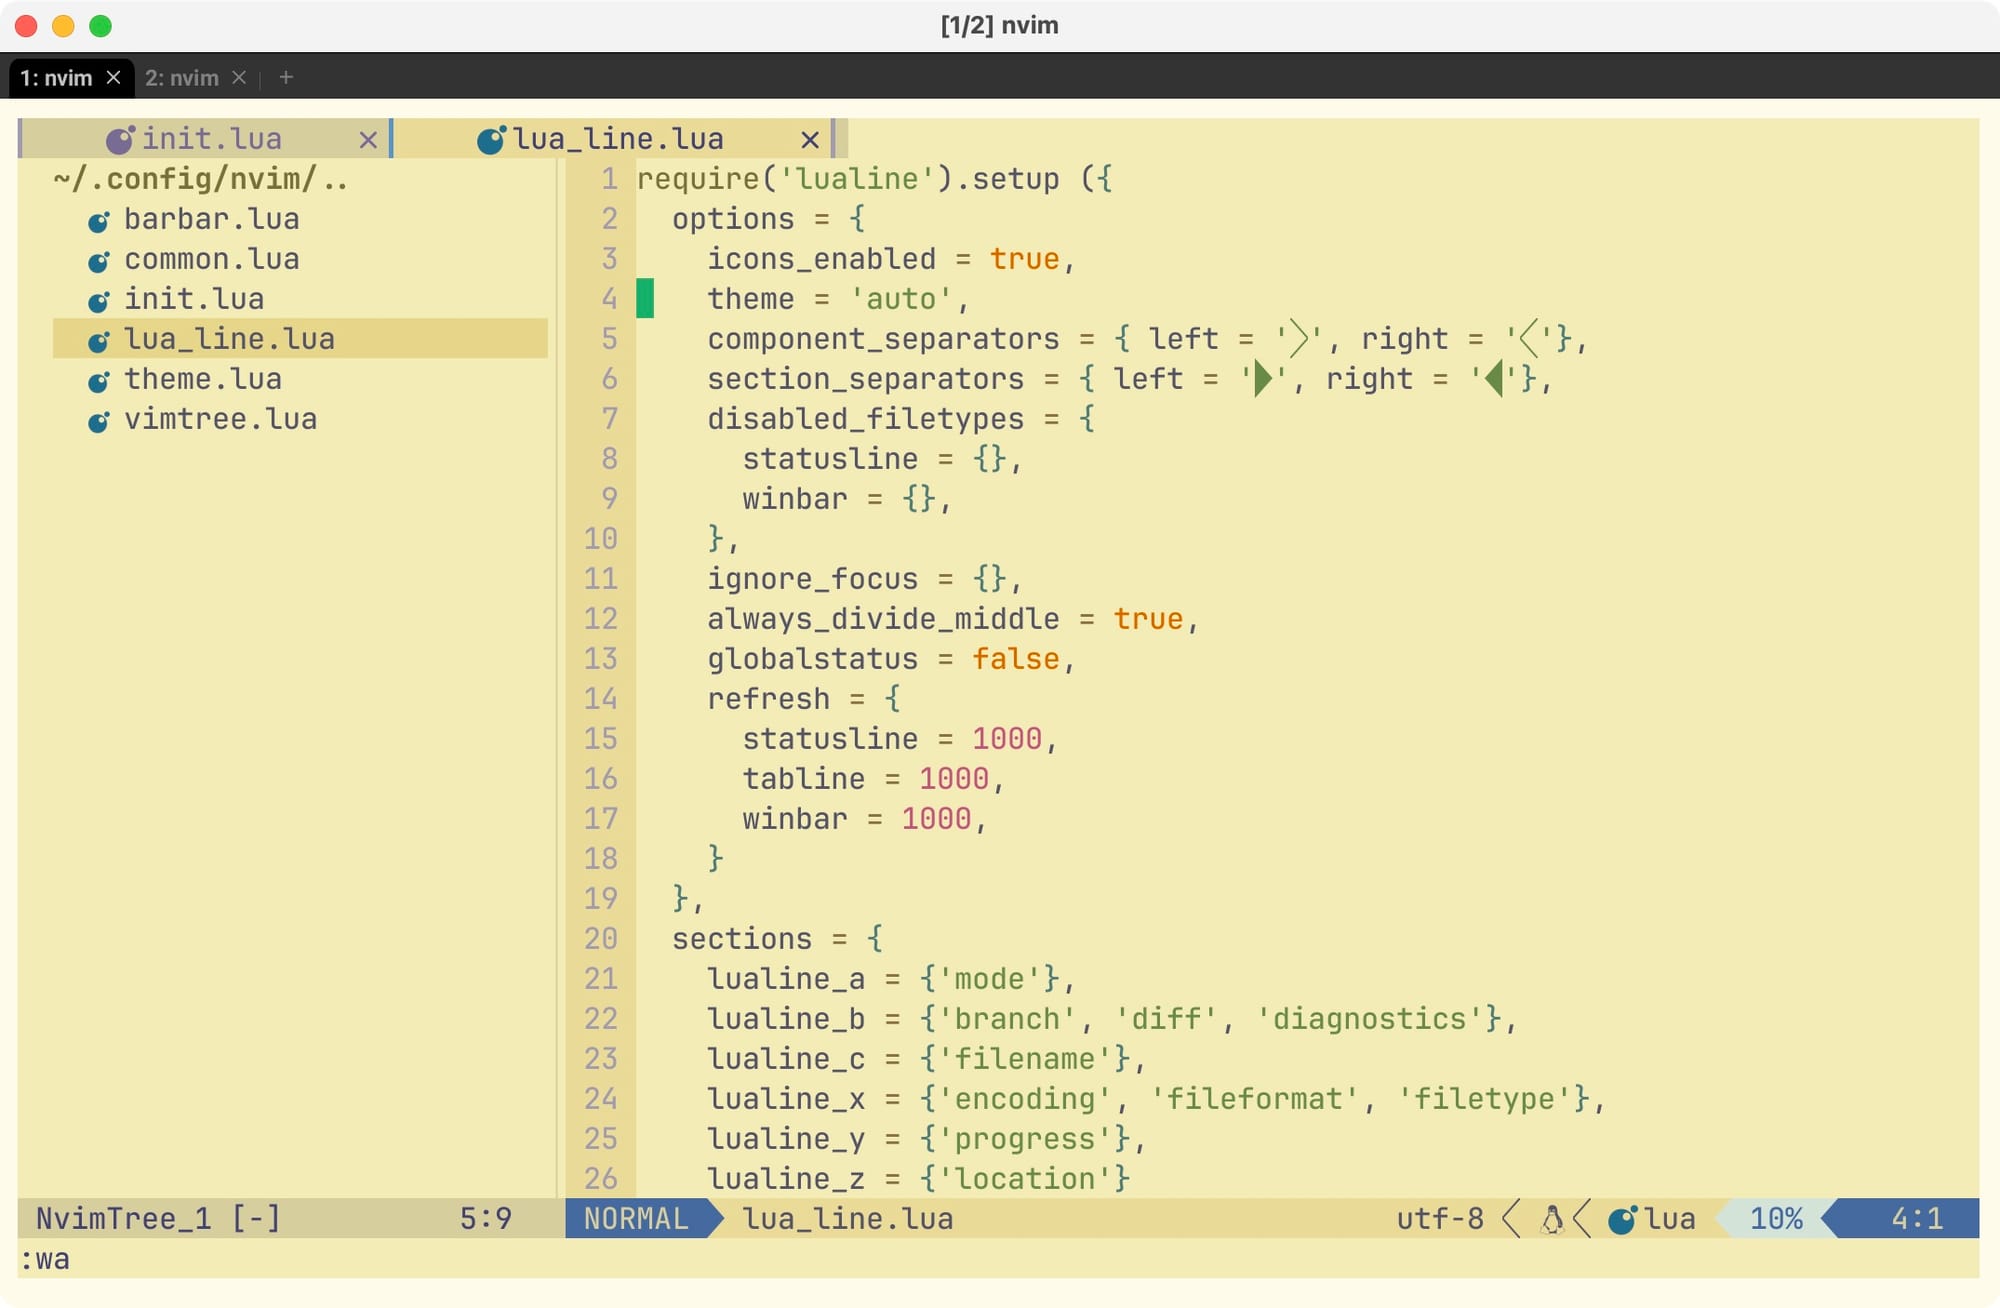
And here's the version with the dark theme:
The possibilities for customizing the editor's appearance are endless. You can add almost anything, from animations to plugins that generate themes using AI.
Now that the basic appearance resembles an IDE, it's time to teach Neovim to understand our code, provide suggestions, and highlight syntax.
TreeSitter - Code Tree
The next step is to add syntax highlighting. TreeSitter is a tool that can parse the code open in the editor and build a syntax tree from it. A syntax tree is a data structure that stores the parsed code. Editors that work with such a tree understand how to highlight different parts of the code, providing us with comprehensive syntax highlighting.
At the time of writing this article, TreeSitter is the most popular way to build a syntax tree. To integrate Neovim with TreeSitter, we need a driver, which will be provided by the plugin nvim-treesitter. Add the plugin to the configuration file:
local vim = vim
local Plug = vim.fn['plug#']

vim.call('plug#begin')

Plug('nvim-treesitter/nvim-treesitter', {['do'] = ':TSUpdate'})

vim.call('plug#end')
Create a file treesitter.lua and add the configuration from the plugin repository:
require'nvim-treesitter.configs'.setup {
ensure_installed = "all",
highlight = { enable = true },
incremental_selection = { enable = true },
textobjects = { enable = true },
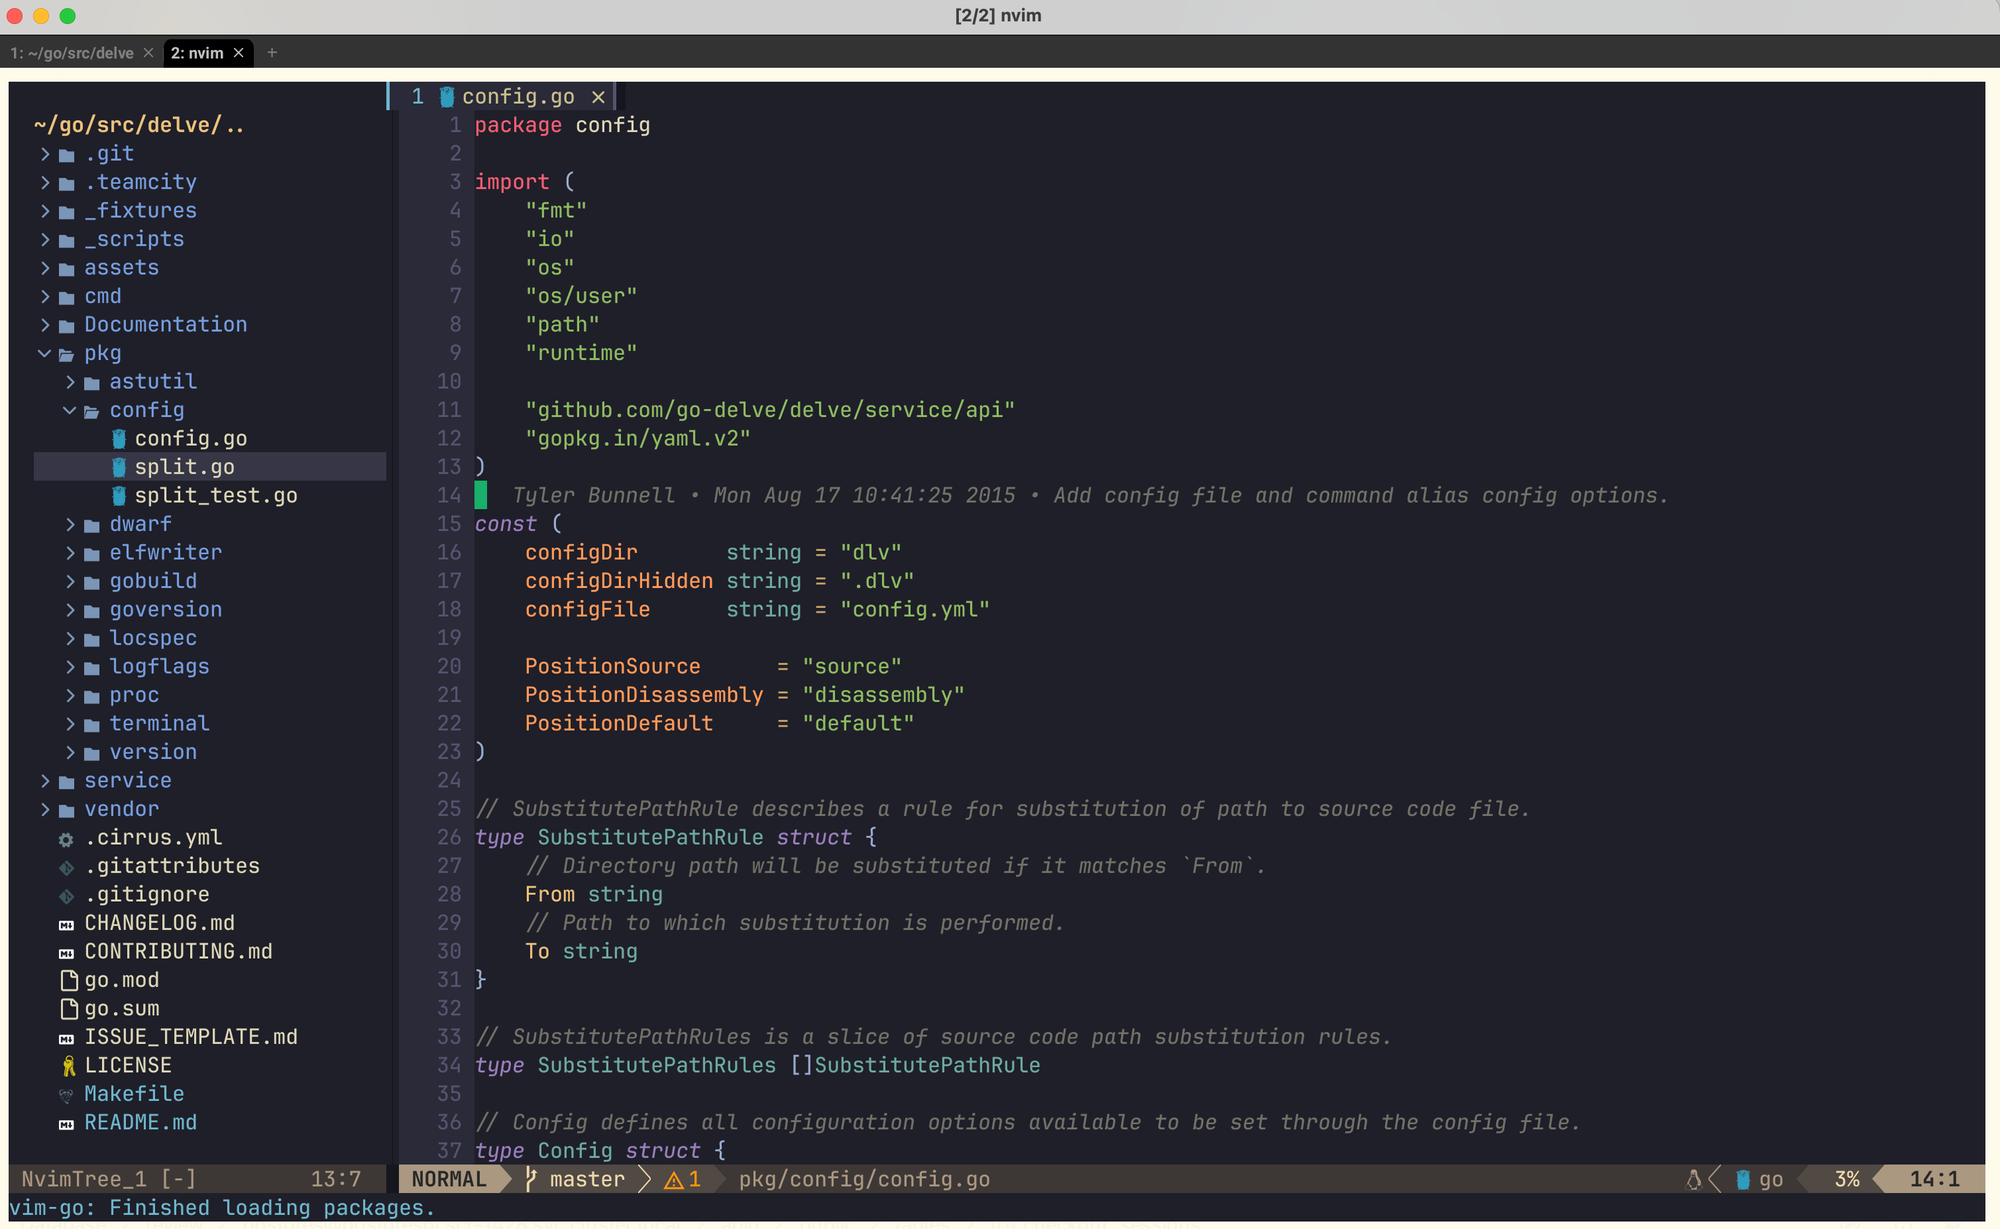
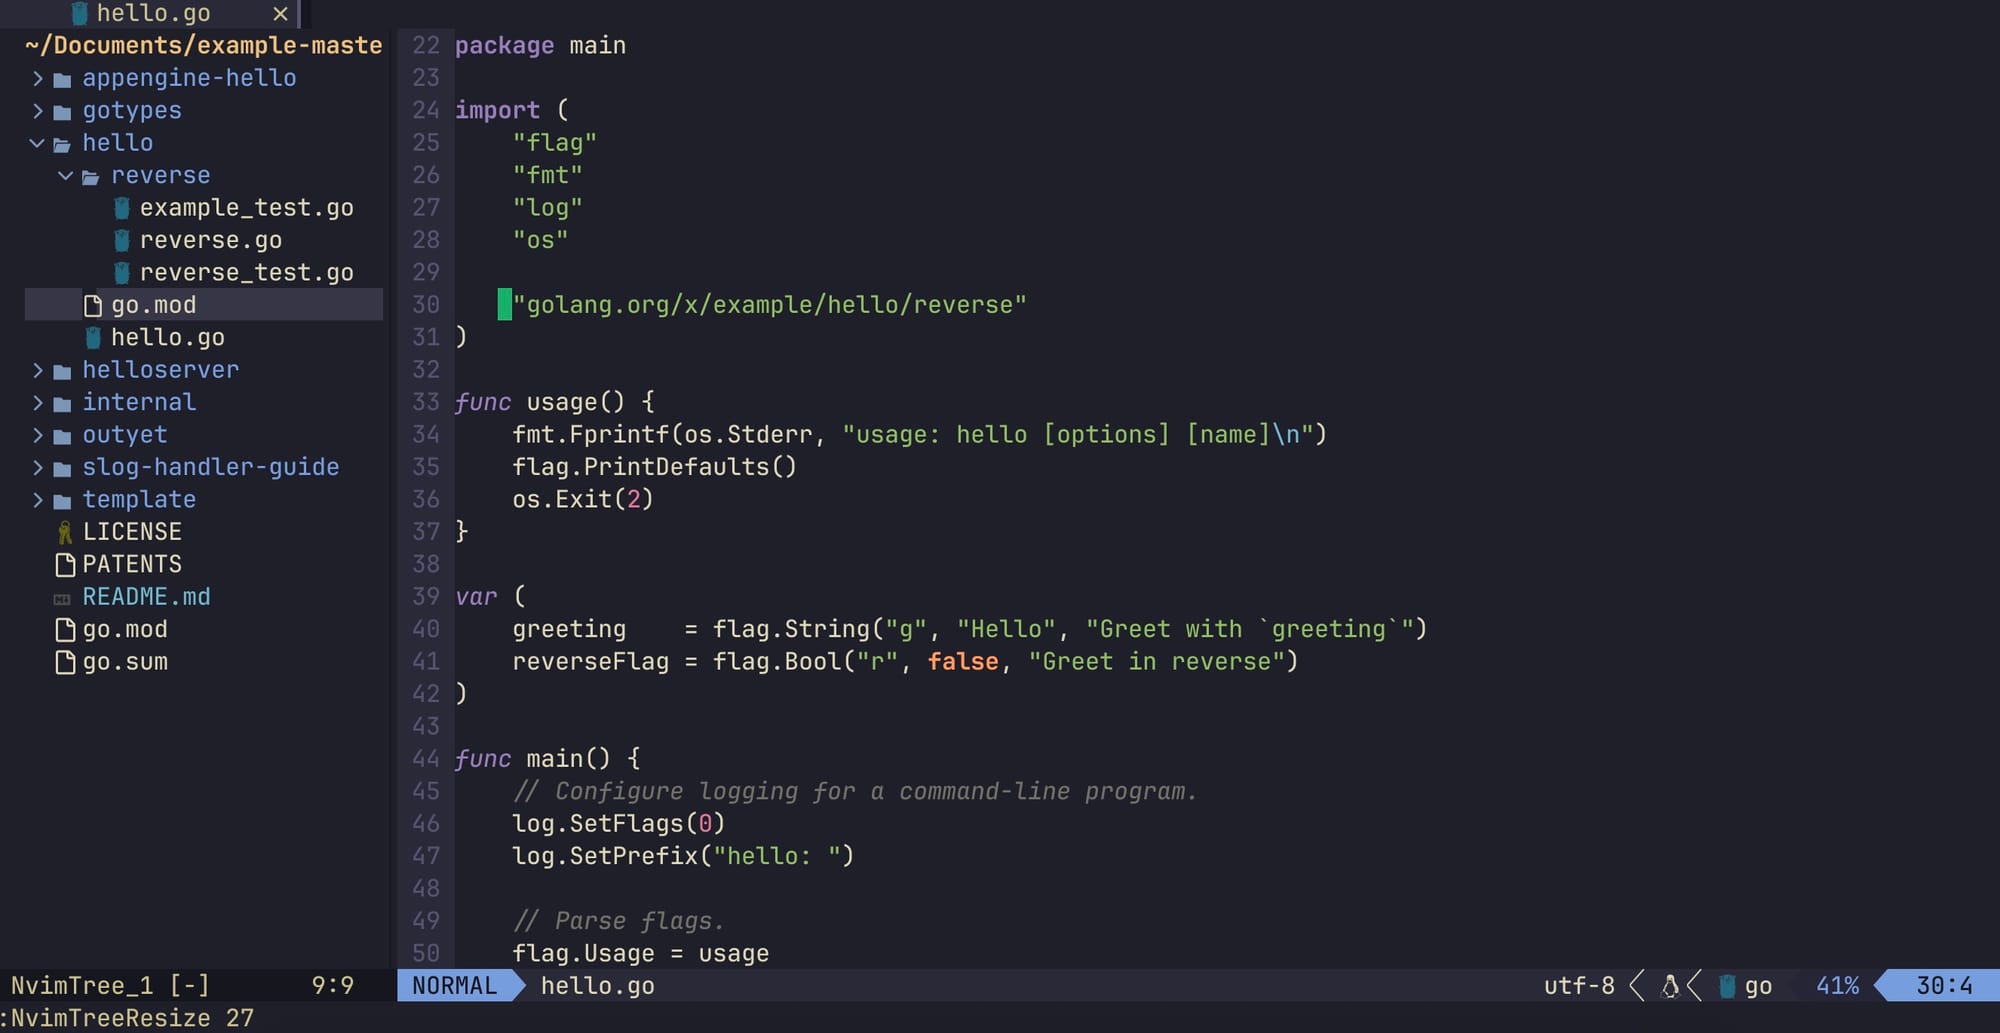
}Save, restart Neovim, and run the command :PlugInstall. After execution, the VimPlug interface will display a message that the TreeSitter plugin has been successfully installed. Now, you need to restart Neovim again to allow TreeSitter to install language parsers. Let's see how the syntax of a Go project looks now:
You can compare it with the screenshot above and see the difference. It looks nicer now, but writing code is still inconvenient—there's no familiar autocomplete, suggestions, error highlighting, or type descriptions. Let's fix that.
LSP Server
TreeSitter has taught Neovim to format code the way we're used to. Now we need to teach Neovim to provide suggestions, highlight errors, and handle code in the familiar way. For this, we will use LSP.
LSP (Language Server Protocol) is a protocol through which a client (editor or IDE) communicates with a server that provides instructions to the client. For example, the client can send a variable to the server, followed by a period, and the server will respond with all possible autocomplete options for that variable. To make the editor understand the code, we need to set up a server that knows everything about the code and the language it is written in, and teach the editor to communicate with this server.
Each language has its own LSP server, which first needs to be installed on the system, and then connected to the editor through a driver. The driver we will use is the plugin nvim-lspconfig. The plugin has excellent documentation where you can find how to set up LSP for many languages.
In this article, I will set up LSP for Golang. For further steps, I assume you already have Go installed.
For Golang, there are several options for LSP servers; I will use the most popular one - gopls:
brew install goplsNow create a file lsp.lua and add the following settings:
local nvim_lsp = require'lspconfig'

-- Mappings.
-- See `:help vim.diagnostic.*` for documentation on any of the below functions
local opts = { noremap=true, silent=true }
vim.api.nvim_set_keymap('n', '<space>e', '<cmd>lua vim.diagnostic.open_float()<CR>', opts)
vim.api.nvim_set_keymap('n', '[d', '<cmd>lua vim.diagnostic.goto_prev()<CR>', opts)
vim.api.nvim_set_keymap('n', ']d', '<cmd>lua vim.diagnostic.goto_next()<CR>', opts)
vim.api.nvim_set_keymap('n', '<space>q', '<cmd>lua vim.diagnostic.setloclist()<CR>', opts)
-- Use an on_attach function to only map the following keys
-- after the language server attaches to the current buffer
local on_attach = function(client, bufnr)
  -- Enable completion triggered by <c-x><c-o>
  vim.api.nvim_buf_set_option(bufnr, 'omnifunc', 'v:lua.vim.lsp.omnifunc')
  -- Mappings.
  -- See `:help vim.lsp.*` for documentation on any of the below functions
  vim.api.nvim_buf_set_keymap(bufnr, 'n', 'gD', '<cmd>lua vim.lsp.buf.declaration()<CR>', opts)
  vim.api.nvim_buf_set_keymap(bufnr, 'n', 'gd', '<cmd>lua vim.lsp.buf.definition()<CR>', opts)
  vim.api.nvim_buf_set_keymap(bufnr, 'n', 'K', '<cmd>lua vim.lsp.buf.hover()<CR>', opts)
  vim.api.nvim_buf_set_keymap(bufnr, 'n', 'gi', '<cmd>lua vim.lsp.buf.implementation()<CR>', opts)
  vim.api.nvim_buf_set_keymap(bufnr, 'n', '<C-k>', '<cmd>lua vim.lsp.buf.signature_help()<CR>', opts)
  vim.api.nvim_buf_set_keymap(bufnr, 'n', '<space>wa', '<cmd>lua vim.lsp.buf.add_workspace_folder()<CR>', opts)
  vim.api.nvim_buf_set_keymap(bufnr, 'n', '<space>wr', '<cmd>lua vim.lsp.buf.remove_workspace_folder()<CR>', opts)
  vim.api.nvim_buf_set_keymap(bufnr, 'n', '<space>wl', '<cmd>lua print(vim.inspect(vim.lsp.buf.list_workspace_folders()))<CR>', opts)
  vim.api.nvim_buf_set_keymap(bufnr, 'n', '<space>D', '<cmd>lua vim.lsp.buf.type_definition()<CR>', opts)
  vim.api.nvim_buf_set_keymap(bufnr, 'n', '<space>rn', '<cmd>lua vim.lsp.buf.rename()<CR>', opts)
  vim.api.nvim_buf_set_keymap(bufnr, 'n', '<space>ca', '<cmd>lua vim.lsp.buf.code_action()<CR>', opts)
  vim.api.nvim_buf_set_keymap(bufnr, 'n', 'gr', '<cmd>lua vim.lsp.buf.references()<CR>', opts)
  vim.api.nvim_buf_set_keymap(bufnr, 'n', '<space>f', '<cmd>lua vim.lsp.buf.formatting()<CR>', opts)
end

-- golang
nvim_lsp.gopls.setup ({
  on_attach = on_attach,
  flags = {
	-- This will be the default in neovim 0.7+
	debounce_text_changes = 150,
  },
  capabilities = {
	  workspace = {
		  didChangeWatchedFiles = {
			  dynamicRegistration = true,
		  },
	  },
  }
})

vim.lsp.handlers["textDocument/publishDiagnostics"] = vim.lsp.with(
	vim.lsp.diagnostic.on_publish_diagnostics, {
		virtual_text = false
	}
)
The section with the mappings and server initialization is standard, taken from the example configurations in the nvim-lspconfig repository.
init.lua:
Plug('neovim/nvim-lspconfig')
...
vim.call('plug#end')
...
require"lsp"
Restart, install the plugin with :PlugInstall, restart again, and open an example Go code file. It's important to note that gopls is configured by default to recognize code only if go.mod is in the project root. Another important point is to ensure that Go is added to the PATH for the shell you are using. I use zsh, and in my .zshrc I have:
export GOPATH=$HOME/golang
export GOROOT=/usr/local/opt/go/libexec
export GOBIN=$GOPATH/bin
export PATH=$PATH:$GOPATH
export PATH=$PATH:$GOROOT/bin
Now, after opening the go code and making sure there are no errors, execute :LspInfo:
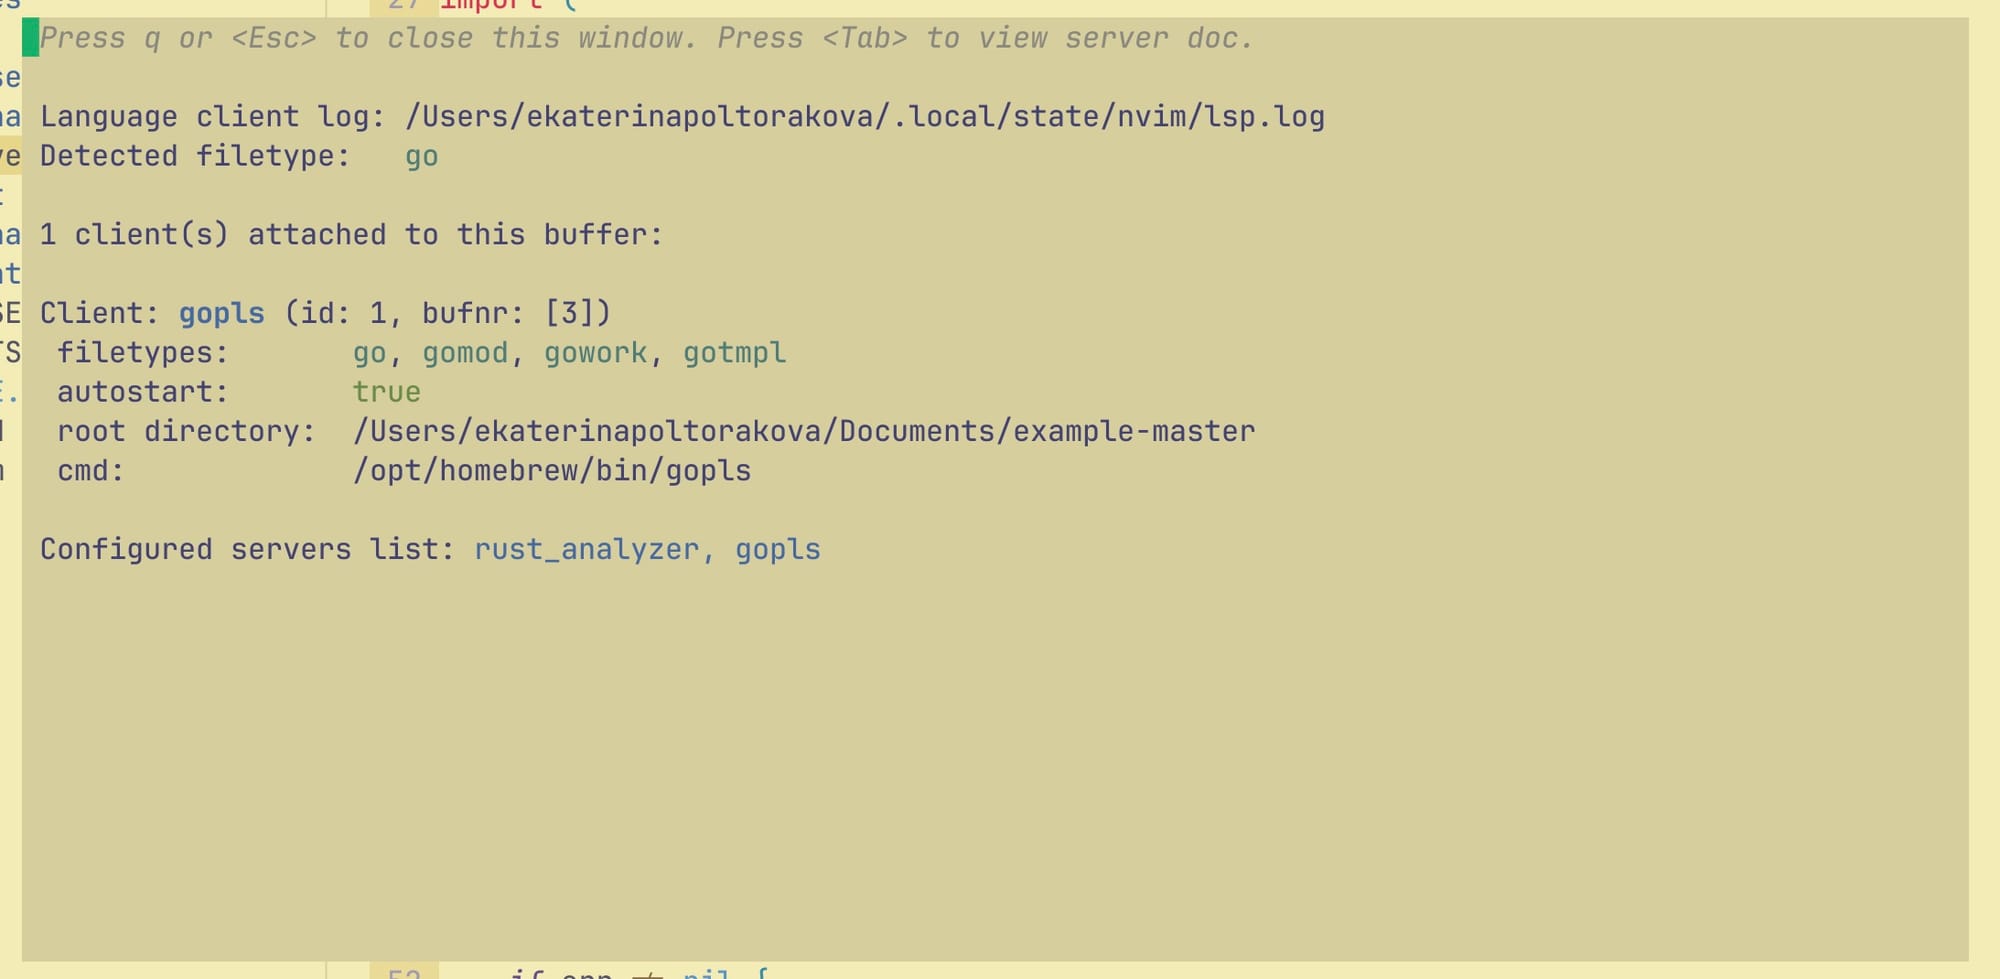
We see that we have an active LSP client, which means Neovim has successfully connected to the LSP server. Although Neovim already supports autocomplete, we need to install a few plugins to make this work visible. For this, I will use a set of plugins from https://github.com/hrsh7th. Create a file cmp.lua and add the following configuration:
vim.o.completeopt="menu,menuone,noselect"

-- Setup nvim-cmp.
local cmp = require'cmp'

cmp.setup({
snippet = {
  -- REQUIRED - you must specify a snippet engine
  expand = function(args)
	vim.fn["vsnip#anonymous"](args.body) -- For `vsnip` users.
	-- require('luasnip').lsp_expand(args.body) -- For `luasnip` users.
	-- require('snippy').expand_snippet(args.body) -- For `snippy` users.
	-- vim.fn["UltiSnips#Anon"](args.body) -- For `ultisnips` users.
  end,
},
window = {
  -- completion = cmp.config.window.bordered(),
  -- documentation = cmp.config.window.bordered(),
},
mapping = cmp.mapping.preset.insert({
  ['<C-b>'] = cmp.mapping.scroll_docs(-4),
  ['<C-f>'] = cmp.mapping.scroll_docs(4),
  ['<C-Space>'] = cmp.mapping.complete(),
  ['<C-e>'] = cmp.mapping.abort(),
  ['<CR>'] = cmp.mapping.confirm({ select = true }),
  ['<Tab>'] = cmp.mapping(function(fallback)
	  local col = vim.fn.col('.') - 1
	  if cmp.visible() then
		cmp.select_next_item(select_opts)
	  elseif col == 0 or vim.fn.getline('.'):sub(col, col):match('%s') then
		fallback()
	  else
		cmp.complete()
	  end
  end, {'i', 's'}),
  ['<S-Tab>'] = cmp.mapping(function(fallback)
	  if cmp.visible() then
		cmp.select_prev_item(select_opts)
	  else
		fallback()
	  end
  end, {'i', 's'}),
}),
sources = cmp.config.sources({
  { name = 'nvim_lsp' },
  { name = 'vsnip' }, -- For vsnip users.
  { name = 'nvim_lsp_signature_help' },
}, {
  { name = 'buffer' },
})
})

-- Set configuration for specific filetype.
cmp.setup.filetype('gitcommit', {
sources = cmp.config.sources({
  { name = 'cmp_git' }, -- You can specify the `cmp_git` source if you were installed it.
}, {
  { name = 'buffer' },
})
})

-- Use buffer source for `/` (if you enabled `native_menu`, this won't work anymore).
cmp.setup.cmdline('/', {
mapping = cmp.mapping.preset.cmdline(),
sources = {
  { name = 'buffer' }
}
})

-- Use cmdline & path source for ':' (if you enabled `native_menu`, this won't work anymore).
cmp.setup.cmdline(':', {
mapping = cmp.mapping.preset.cmdline(),
sources = cmp.config.sources({
  { name = 'path' }
}, {
  { name = 'cmdline' }
})
})
Now connect plugins and config init.lua:
Plug('hrsh7th/cmp-buffer')
Plug('hrsh7th/cmp-path')
Plug('hrsh7th/cmp-cmdline')
Plug('hrsh7th/nvim-cmp')
Plug('hrsh7th/cmp-nvim-lsp' )
Plug('hrsh7th/cmp-nvim-lsp-signature-help')
vim.call('plug#end')
...
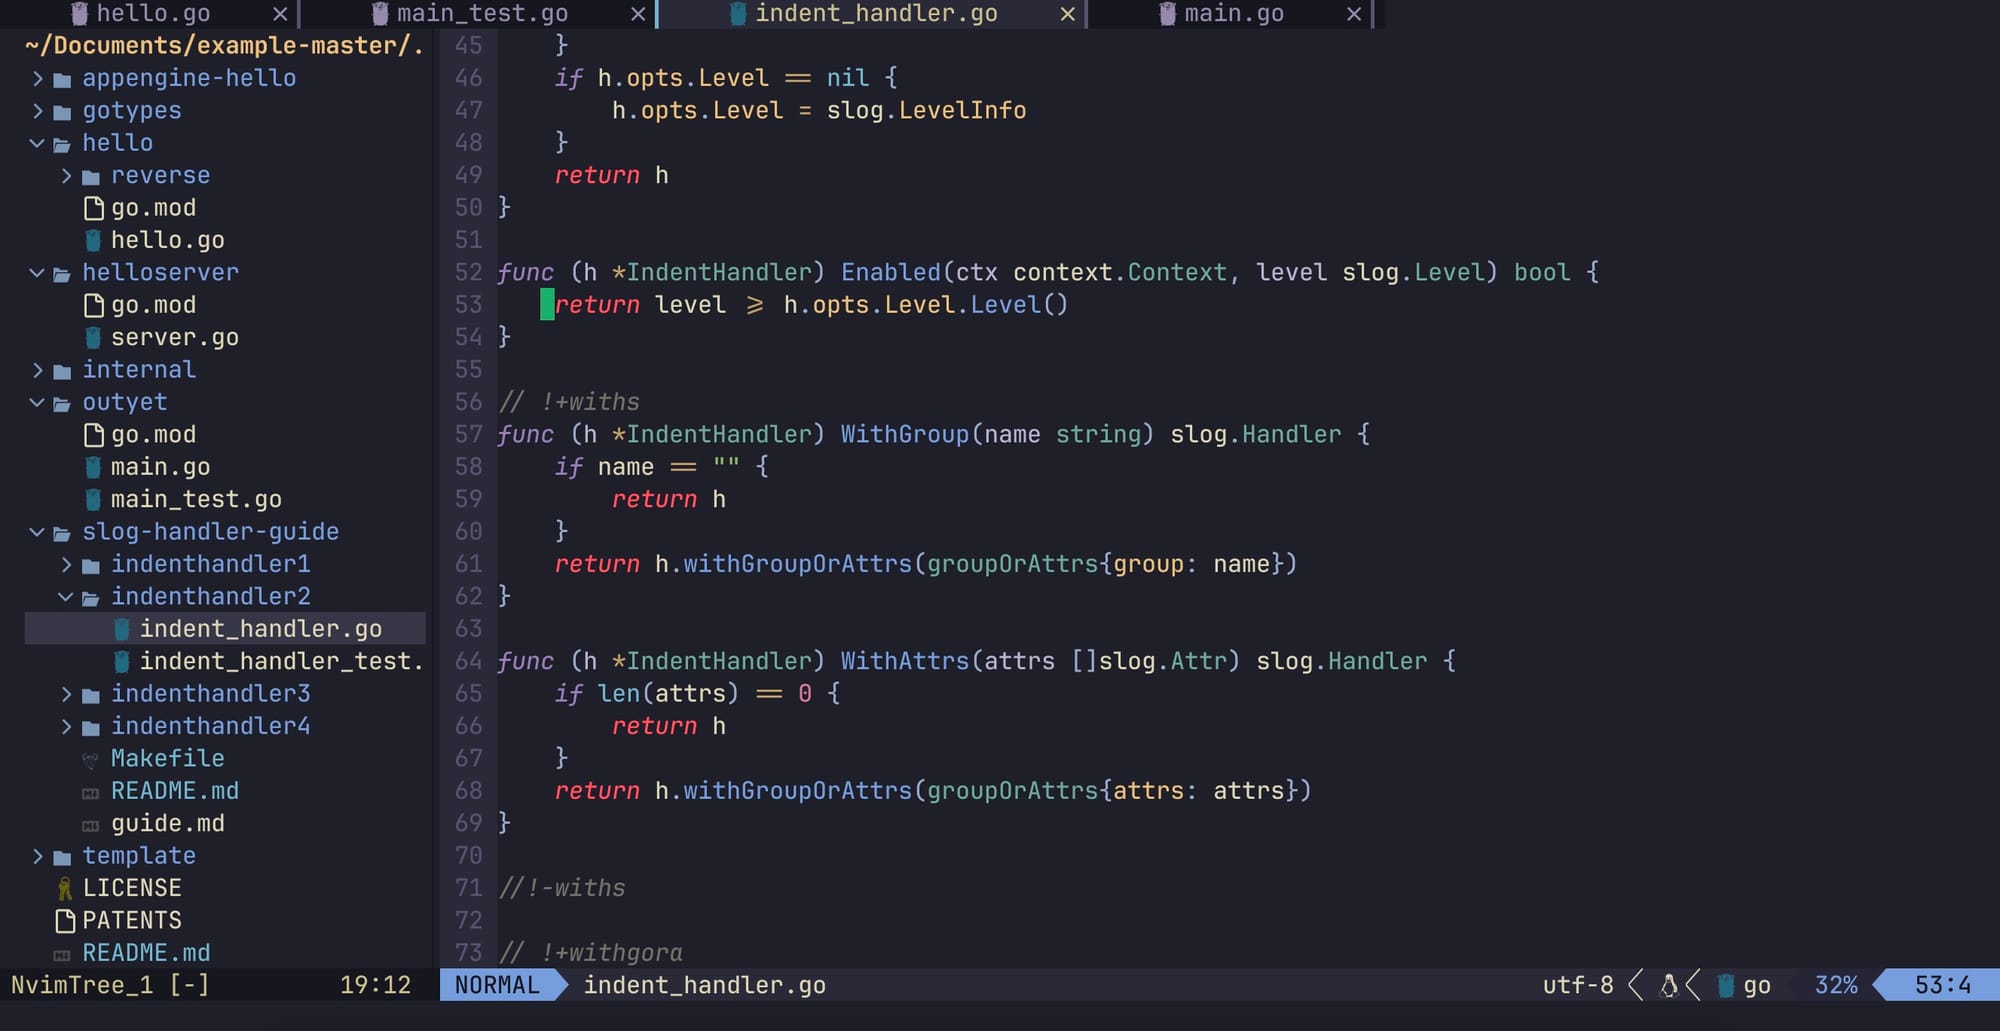
require"cmp_config"Install it with :PlugInstall and check:
At this stage, we have an editor that visually resembles the familiar IDE style and can work with code in the format we're used to. I think we can logically conclude the first article here to prevent it from becoming excessively long. In the next series, we will set up familiar file and text search, configure convenient mappings for most actions, and I'll add 5-10 more plugins that greatly simplify everyday development.
You can find the full configuration code here: GitHub Repository
The old configuration in nvim format (working, but outdated and has many differences from the current Lua version): Old Configuration
Subscribe to my telegram channel - https://t.me/digest_golang - here I share useful articles, tools and everything around the go programming language every day